Workout of The Week 5.16.16: Core-geous

Feature Photo:
Model: Lindsay Blair
Photographer: Dylan Fox

Intro

The word “core” is a collective term used to describe the muscles of your midsection. They include, but are not limited to the rectus abdominis, internal/external obliques, transverse abdominal, quadratus lumborum, and spinal erectors. While these muscles have their own individual functions, they also work together in almost every movement you make.

I’m frequently asked which exercises you should be doing in order to get a great looking core. Unfortunately, my answer is not what you want to hear, because a sculpted core is not built in the gym, but in the kitchen through dieting (not crunches on the counter lol). In fact, athletes with some of the most aesthetically pleasing mid-sections you’ve ever seen, may not even directly work them. This common misconception derives from the belief of “spot-training”, or the act of burning fat in a particular area by simply training it. While there may be some metabolic improvements caused by increased muscle, it’s far too inefficient to be the sole path to a shredded 6-pack.

Before you completely write-off that 10 minute abdominal workout you do at the end of your workout, you should be aware that core work still has great value. Remember, the body is not designed to look good- its designed for function. These functions include stability, strength, balance, etc. Therefore, the better your core, the easier it is to maintain good form and prevent injury. Most say you should train legs because it’s your foundation, I would disagree, your core is.


Warm-up

  • Abdominal bracing- while lying on your back, contract your midsection. This does not mean suck them in, this means squeeze as they are. Hint: tighten your midsection as if someone were going to punch you there.
  • Warm-up sets: perform 1-2 easier sets of the exercise so that you can become more familiar with the form and movement.

Working Sets


Oblique Kayaks: 3 Sets x Perform reps as your fitness level allows; 60s rest

Set-up: You will need a weight bar and a decline bench. Sit normally on the bench, as you would for a sit-up.

Execution: Lean back until your hips are at a 90 degree angle, you should feel the tension of your core holding your body up at this point. Hold the bar with a shoulder-width grip, and your elbows tight to your sides. Using your core, and not your arms, twist your core to resemble paddling in a kayak. Remember, your core does all the movement, not your arms!

Tips: I typically do these until I have about 20% of my energy left, at that point I use the remaining energy to perform Russian twists until just before failure.


Decline Bench Reverse Crunch: 2 sets of 10-20 reps; superset with next exercise

Set-up: You will need a decline bench, much like you did with the first exercise. You will need to lay the opposite direction.Hold on to bench above your head to keep yourself from sliding down. I typically grab the leg pads. (see pic for set-up)

Execution: Begin by contracting your core and raising your legs; knees slightly bent. Then, using your core, bend your knees and bring them to your chest until you reach a tight contraction. Then, slowly extend your legs back out to the starting position without touching the ground; repeat.

Tips: To ensure you are working your core and not just your legs (which may burn), make sure you slightly roll your hips as you crunch. This movement should be subtle, but it should be done for a quality contraction.

decline reverse crunch.jpg
Reverse crunch. Notice hips


Exercise ball DB crunch: 3 sets of 15 reps; 60s rest

Set-up: You will need a dumbbell (usually 5-15lbs will suffice), and an exercise ball. Begin by sitting on the ball, then in a controlled fashion, roll your body down until you are on your back. I typically like to position the ball so that I feel I am holding my head and shoulders up. Your feet should be wider than shoulder width for a solid base. You should hold the dumbbell behind your head, but not touching. Keep your elbows flared outward.

Execution: Begin by bracing your core, and picking a spot on the ceiling to stair at (look at head position in example). I typically like to pick one about 10 feet in front of me. Now, perform a crunch. This is not a

ball crunch
DB held behind head (not shown)

sit-up, so your hips should remain still. All the movement should be made between your chest and your hips. After you have crunched up into a solid contraction, slowly control your way back down until just below the starting position.


Tips: The particular exercise is best described by looking at the example picture. Stay on top of the ball, keep elbows wide, and only crunch at the stomach.

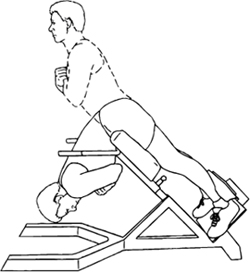
Back Raises: 3 sets of 15 reps; 30s rest

Set-up: You will need a lumbar extension pad, and possibly a barbell plate. Adjust the pad height so that it rests just below the crease of your hips.

Execution: Begin by contracting your core. Drop your torso using your hips until just before your back rolls. This is important, as the movement should be solely in your hips. Then, keeping your core braced, use your lower back to raise up to a straight position. A common
back raises
Straight back, movement in hips

mistake is to hyper-extend (over raise), this is unnecessary and unhealthy-avoid it.


Tips: If using weight, hold the plate firmly against your chest with a crossed-arm grip. Remember, you should avoid excessive rolling of the back. This may take practice, and may be limited to the individuals flexibility range of motion.


Last note:

  • Core workouts are funny, because a particular exercise may work greatly for one person, and not at all for another. It all comes down to the person’s body and their balances or lack there of.
  • Also, if you are new to working out, don’t be alarmed if you feel a burn in your lower back. This is usually fatigue, and will improve as you continue with future workouts.
  • Core should be done at the end of a workout, you need them for stability, so it wouldn’t be wise to fatigue them first.
  • Core should also be done every other day. Doing them daily can lead to overworking, and that can cause issues.


PRAY

God gave you another day, and another healthy workout.


Kyle Blair, BS Exercise Physiology, CPT, SPT


Workout of The Week 3.21.16-Phull-body Gainz


INTRO

You may have read the title with confusion. You may have either thought I made a word up, or I felt like being cool by replacing an “F” with a “Ph”. Well, if you thought any of these things, you are correct. However, there is actually more to the word than that. I actually combined 3 different training styles into one word- power, hypertrophy, and full body. Can you tell me the absolutely unbreakable workout rule that says you can’t combine these into one workout? I’ll wait. While I’m not huge on extreme variation in training, I think an unconventional workout here and there can not only give the body a new stimuli, but can serve as a mental boost alike.

Power: The amount of work per unit of time. Basically, lifting with speed or velocity.

Hypertrophy: Lifting specifically for muscular growth.

Full-body: A workout in which you target every major body part.


WARM-UP

Cardiovascular machine- 5min-10min: I would suggest a bike on a moderate resistance, since peddling places a greater amount of focus on the quads/hamstrings. Do not go overboard, because you do not want to hinder your lifting performance.

Dynamic/mobility routine- 5-10 minutes: This routine should consist of multi-joint, large muscle group movements that favor/mimic that of the workout below. You should work on passive motions in the joints to a range of motion close to functional limits. Remember, this should be moderately intense, do not go overboard.

Light warm-up sets- 1-2 sets of 10-15 reps with very moderate weight. This will familiarize the movement, and bring blood to the lower body.


WORKING SETS

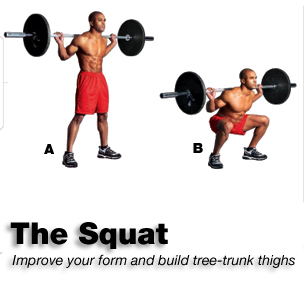
Barbell Back Squat: 5×3; 120s rest (power)

Set-up: This set up is just like a normal squat, but lighter. You want to aim for roughly 70% of the weight you would normally do for 3 reps. The idea is speed and explosiveness, not simply lifting the weight.

Execution: To perform this lift, I would suggest descending at a normal speed. Then, unlike normal squat speed, explode from the bottom-up. Form should be sound, as sloppy form and squatsspeed are a dangerous combination. I would suggest practicing with weight much lighter than maximum.
Tips: A good rule of thumb for weight is to vibe how “explosive” you move. If you can shoot up so quick that the barbell nearly (or actually) leaves your shoulders, than the weight is too light. Contrarily, if you feel you are moving slowly, or “sticking”, than the weight is too heavy.


DB Front Squats: 3×15; super-set with hamstring curl (hypertrophy)

Set-up: You will need a set of dumbbells, and some adequate room. You will begin by curling the dumbbells up until they rest at your chest, with your fingers facing your body. I would suggest flaring elbows forward so that the dumbbells lean on your chest, and not force you to feel as if you’re curling them.

Execution: You should perform a squat with more of a vertical posture. This is done by

DB front squat
DB front squat

keeping chest as upright as possible, leaning over less, and allowing knees to move over feet more than usual (this won’t destroy them lol). Think of this technique more as a front squat, than a back squat.

Tips: You may feel the tendency of a forward pulling at first. This is caused by too much leaning, and not enough kneed flexion. Also, try overcompensating the weight into your heels, it may help until form is corrected.

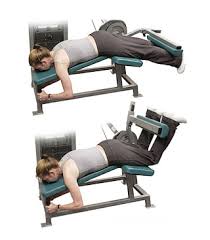
Hamstring Curl: 3×15; 60s rest (hypertrophy)

Set-up: This is not angle specific. Feel free to use a lying, seated, leaning, or standing leg curl machine.

Execution: While keeping your toes pulled back, curl your leg until you hit a tight

hamstring curl.jpg
hamstring curl

contraction in the hamstring. Then, descend in a much slower/controlled fashion.

Tips: Some momentum is normal and expected, however, if you feel yourself unconsciously arching your back or swinging the weight, lighten the load. Basically, drop the ego, and lift to grow.

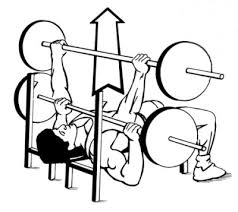
Bench Press: 5×3; 120s rest (power)

Set-up: You will need a barbell bench press, and a spotter. Much like the squat earlier, only add weight you can manage to move quickly.

Execution: Lower the bar in a normal motion until touching chest, then explode upward.

bench press.jpg
Bench press

You should lockout to reset. Repeat.

Tips: Much like the squat earlier, the bar should move quickly, but not so much that you almost dislocate your shoulder.


DB Fly + Neutral Press: 3×12; 60s rest (hypertrophy)

Set-up: You will need a flat or incline bench. You will also need a set of dumbbells you can do 8 reps or so on chest fly with.

Execution:

Part 1: Begin the lift with a DB Chest fly. Fingers facing each other, and arms slig-

chest fly
Part 1

htly bent as if you were going to hug a wide tree. Descend in a controlled fashion, focusing on a deep stretch in the chest. Then, rise towards the mid-line, stopping just before lockout. Perform this for 6 reps.


Part 2: Without stopping, switch into a press of the same style ( fingers still facing each other). Perform 6 of these as well.

Hammer-Grip-Decline-Bench-Press
Part 2 (notice greater elbow bend)

Tips: Basically do 6 of each, for a continuous total of 12.


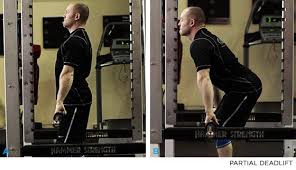
Rack-pull From Knees: 5×3; 120s rest (power)

Set-up: You will need a squat rack, a barbell, and a cross bar (safety catch). You should set the height of the cross bar to just below or at your knees. You should use weight roughly 80% of your dead lift amount. Remember, explosive and speedy.

Execution: Begin by placing your shins/knees as closely to the bar as possible, and gripping it about shoulder width. Your lower back should be neutral, and your chest upright. Your chore should be tight and rigid. Place some tension on your straightened arms, and feet.

rack pull.jpg
rack pull from knees

Then, using your hips, stand up straight; much like a dead lift. As you raise, the bar should remain as tight to the body as possible.

Tips: This is one of the most common “ego-lifts” there are. Don’t let it consume you, instead, lift what you can. Do not use a tap-and-go method- reset. Instead, the movements should be quick, and your form should be as perfect as possible.


DB Reverse Fly: 3×15- 60s rest (hypertrophy)

Set-up: You may do on fly machine, with dumbbells, or cable machine; each have their own feel and benefit. Just make sure your spine and head remain neutral, can cause nerve pinching if not.

Execution: As mentioned, keep back/ neck neutral. While keeping elbows almost, but not completely locked out, open arms out from side until a contraction of your upper back and shoulders stop the movement. The movement should be controlled, as this is a technique needed isolation lift, rather than a heavy weight type.

DB Reverse Fly
DB Reverse Fly

Tips: Mentally chase the burn while doing this movement, which will take practice. If hands are prone, the movement will target post deltoids and traps. If hands are neutral, the upper back will be targeted more; experiment with both.


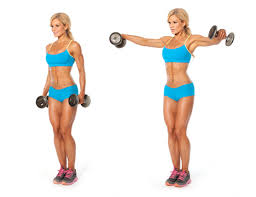
DB lateral raise: 3×15; 60 rest (hypertrophy)

Set-up: You will need a pair of dumbbells, and an arms-length amount of room.

Execution: While keeping elbows slightly bent, and shoulders depressed (not shrugged), raise your arms out from the sides of your body. Your elbows should always be higher than

lateral raise.jpg
Lateral raise

your hands.

Tips: If you feel you are shrugging, the weight is too heavy. If you uncontrollably bend your elbows, the weight is too heavy. If your hands rise before your elbow, the weight is too heavy.


Oh-F@!%s: 2×40 reps; 120s rest. (hypertrophy)

Set-up: You will need an EZ-bar, and a flat bench.I would suggest getting weight you can curl and/or do skull crushers for 20 reps with.

Execution (4 parts immediately in a row):

Part 1: Its a reverse grip (fingers facing forehead) skull crusher. I would suggest gripping the bar shoulder width, at a position is you can fully wrap your hand around. You should not reach failure, or struggle. – 10 reps

Part 2: It’s a normal E-Z bar curl. Stand up, and curl the bar with the exact same grip. You should not reach failure or struggle. – 10 reps

Part 3: A normal skull crusher (fingers facing away from forehead). While keeping elbows tight, perform a proper skull crusher. You may reach failure or just before at the last rep of this phase.– 10 reps

Part 4: It’s a reverse grip curl (palms down). You should curl in a reverse fashion. Make sure to keep wrists neutral, and elbows forward. – 10 reps

oh fuck


Tips: Keep the weight more modest than not. I would suggest a partner’s help. Buckle up for some burning. These should make you say “oh-f#$%” when you have to do them- hence the name.


This concludes the Phull-body workout. I would suggest taking a rest day following this workout.


STRETCH

The picture below has some recommend stretches to do following this workout. Both upper and lower should be performed.

Do each stretch for 2-3 sets of 10-20 second holds.

Back stretches
Upper body stretches
Legs, Groin & Hips Stretches 001
Lower body stretches

PRAY

God gave you another day, and another healthy workout.


Kyle Blair, BS Exercise Physiology, CPT