Introduction
The notorious calve muscle.. That one muscle that really just doesn’t like to grow. Genetics either blessed you with ankle melons, or cursed you with cankles (the term used for legs where you cannot distinguish the ankle from the calve muscle lol), You have them or you don’t, right? Well, not exactly. Perhaps they just grow at an incredibly slow rate for some, but that doesn’t mean they aren’t growing. To illustrate what I am saying, think of the damage rain can do to side walks. Does one drop put a dent? No. How about 1,000

drops? Probably not. It’s only after years and years of persistence, and repetition, that something as simple as water can demonstrate its corrosive properties. Calve muscles are no different. After all, not working them at all is 100% not going to make them grow.
Let’s examine the anatomy and physiology of the calve muscle, and hopefully that will shed some light. The lower leg region is made up of 4 compartments (see figure I-1). The anterior compartment’s main mover is the tibialis anterior, which is responsible for balance and dorsal flexion (pull foot upward). This muscle is mostly comprised of slow twitch fibers, and therefore, responds to higher reps. The lateral compartment is comprised of the peroneus muscle group. This group, much like the previous mentioned, responds to higher reps. The third group, the superficial posterior (very back of leg), contains the gastrocnemius, which is the actual muscle most would refer to as the “calve”. This muscle has a higher concentration of fast twitch fibers, thus responding greater to heavier/explosive lifting. The fourth and final compartment is the deep posterior. This area houses the soleus muscle, which is responsible for pressing the foot down while the leg is bent. It’s fiber content is more so slow twitch, making it more responsive to higher reps.
So, how does one take this information and apply it to their calve workouts? The answer is simple; variety. The best way to grow your calves is to hit them in every way. I’m talking toes in, toes out, legs straight, legs bent, heavy weight/low rep, lighter weight/high rep, etc. This is how you should approach each and every session.
WARM-UP
Cardiovascular machine- 5min-10min: A treadmill, bike, elliptical, stair master, rower, etc. A slow to moderate pace is sufficient. Focus on breathing technique.
Ankle ABC’s: With each foot, spell the entire alphabet. Make sure to make the letters as big as possible. Do not rush, this is not a timed challenge.
Light warm-up sets: 2-3 sets of 10-15 reps with very moderate weight. This will familiarize the movement, and bring blood to the area.
WORKING SETS
Smith machine calve raise: 4 sets x 6-10 reps
Set-up: You will need a smith machine, and a platform of some sort. I would suggest something wide, and firm. DO NOT grab something narrow or light, as it may flip over (personal experience lol). I would recommend an aerobic step, a thicker bumper plate, or something specifically designed for calve raises. The bar of the smith machine should be set so that your knees are moderately bent. Trust me, too low is far safer than too high.

Execution: Begin by raising the bar, and releasing the hooks of the machine. As you begin the downward motion, control it. Do not let it control you, this is key. After you reach the bottom of the movement, explode upward until you reach a solid contraction. Hold the contraction for 1-2 seconds, and then repeat the movement. I like to stop 1-2 reps short of failure to ensure I will have the energy to re-hook the machine safely.
Tips: This is an ego lift for many, do not be those people. Ask yourself, do you want to sloppily lift too much weight, or do you truly want to grow your calves? If you want growth, I would recommend great control of the movement through the entire range of motion. That means no half reps, or bouncing.
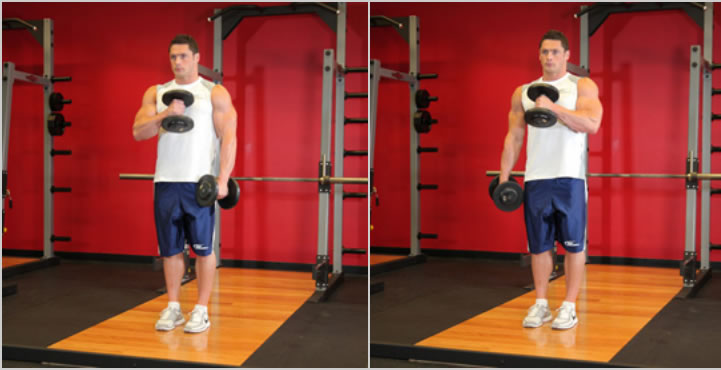
Donkey calf raise: 3×10; 60s rest

donkey calf raise
Set-up: You will need a machine designed for it, a seated leg press machine, or a friend who doesn’t mind public humiliation. If you are using a seated leg press, make sure to adjust the seat as up and down as it allows. The idea is to have your hips at 90 degrees.
Execution: This movement should begin with the calves in a

no shame donkey calf raise
deep stretch, at the bottom of the movement. While keeping your hips bent and your legs straight, raise the weight until you reach a solid contraction. Then, slowly descend back to the starting position and repeat.
Tips: It is crucial to keep your knees from bending while doing this exercise. It’s effect is weakened if not adhered to. I also find controlled pausing at the bottom and the top of the motion helps tremendously in increasing the intensity.
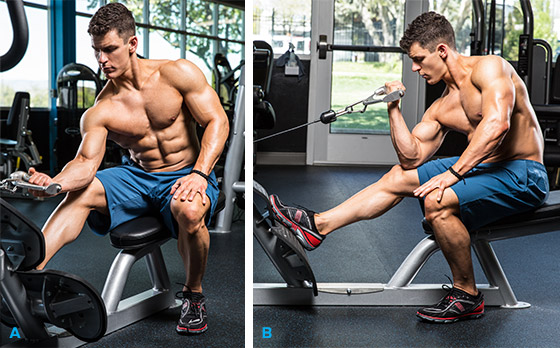
Seated calve raises: 3 sets x 20-30 reps; 90s rests
Set-up: You will need a machine specifically designed for this exercise. If your gym does not own one, you may try these options: Using the leg extension machine with a block for your feet (see picture), or a leg press while keeping your knees bent.

-
Seated calf raise
Execution: Much like the previous exercise, you should begin the moment with the heels lowered into a deep stretch. Once set-up, begin the reps. While emphasizing full range of motion, and controlling the descent, keep the motion continuous. Do not stop mid-set. Do not pause mid-rep. Continue the motion all the way through.
Tips: I find this exercise is most efficient if done with a 3 and 1 rhythm. This means the lowering should take 3 seconds, followed by a 1 second upward motion. Another method you may experiment with is the 10 and 10 style, or 10 regular reps, and 10 explosive reps. You may also try the 28-method, which goes as follows: 7 regular reps, 7 at half the speed, 7 half way up, and 7 at the top half, focusing on the squeeze.

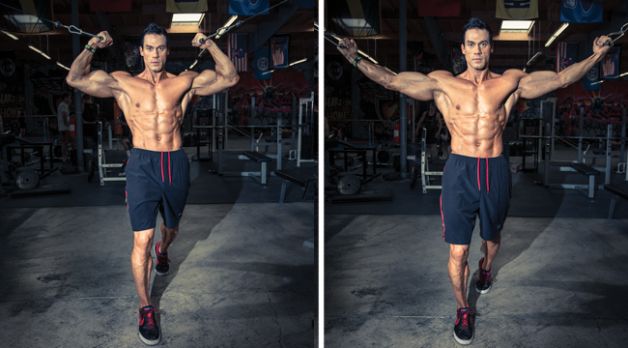
Alternative method seated raise
THIS CONCLUDES THE WORKOUT
TIPS
- The goldfish theory: The calve is full of dense muscular fascia, which can become tight and restriction. Some believe that his prevents the muscle from wanting to expand, much like a small tank restricts the growth of a gold fish. Therefore, it is speculated that constant stretching and foam rolling may promote growth.
- Try different angle: The smith machine calve raise and the donkey calve raise are the best for this. If you are doing three sets, change it each time. For example: set 1= toes straight, set 2= toes inward, set 3= toes outward. To add to this, do not simply change the foot position, but also the way you push. For example, when the feet are inward, push from the inner foot; vice versa.
- Hit your calves as you would any other muscle group: Do not simply throw 3-4 sets of low effort calve raises at the end of your leg day. I personally designate a day solely to calves, core, and forearms.
STRETCH
- 3-5 repetitions per stretch
- 10-20s second hold each


PRAY
You had another healthy workout.
Kyle Blair
Email: kblair_fitness@aol.com